

Follow these steps to set up your Pulsa Frontier device and connect it to the Pulsa App or Desktop interface:
1
Locate and Register the Main Port
Note: Do NOT physically connect any sensors to the port(s) until after the registration of the port(s) are completed on the Dashboard/App.
- Find the Main Port QR Code on your Pulsa Frontier device.
- If using the Pulsa App:
- Scan the Main Port QR code directly in the app.
- If using a desktop interface:
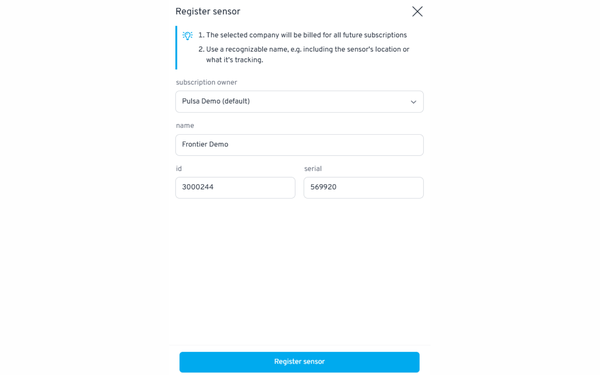
- Navigate to the "Register Sensor" tab by clicking the "+ Add" icon in the top-right corner of the Sensors page.
- Enter the Main Port's Sensor ID and Serial Number (S/N) manually.

2
Assign a Port Name
- Assign a unique name to the Main Port.
- If you scanned the QR code, the Port ID and Serial Number fields will automatically be pre-filled.
3
Choose Ports to Register
- Decide whether to:
- Register only the Main Port, or
- Register both the Main Port and the Second Port.
Note: If only one Port will be utilized/registered, it will need to be the main port.

4
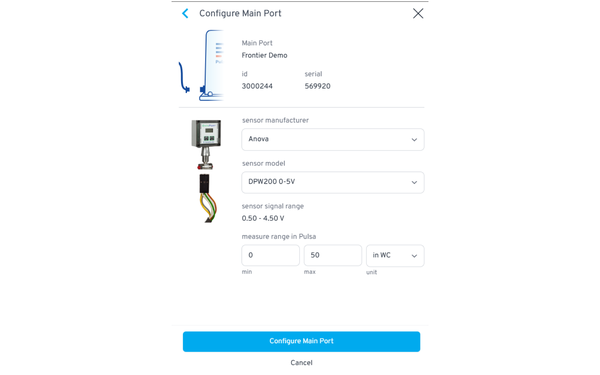
Configure the Main Port
- Select the sensor type you’ll connect to the Main Port.
- Confirm the following details for the sensor:
- Manufacturer
- Model
- Sensor output signal range
- Enter the measurement range and specify the units. The measurement range of the sensor may differ from the empty and full capacity of the container.
Note: Please ensure that the port configurations are correct. Selecting the wrong sensor type or entering inaccurate signal ranges can potentially damage your sensor.
5
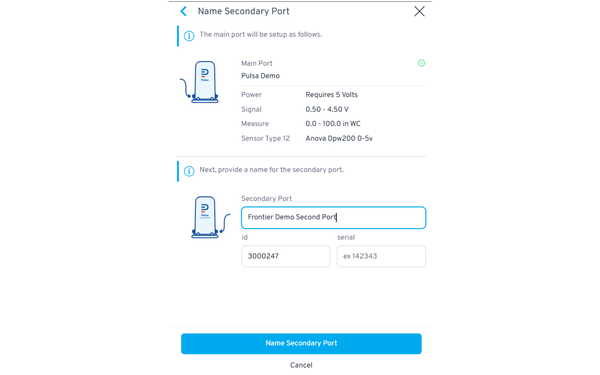
Configure the Second Port (if applicable)
- If registering both ports, assign a name to the Second Port.
- Enter the Second Port’s Serial Number.
- Set up the Second Port similarly to the Main Port by:
- Selecting the sensor type.
- Confirming the manufacturer, model, and sensor output signal range.
- Entering the measurement range and units.
6
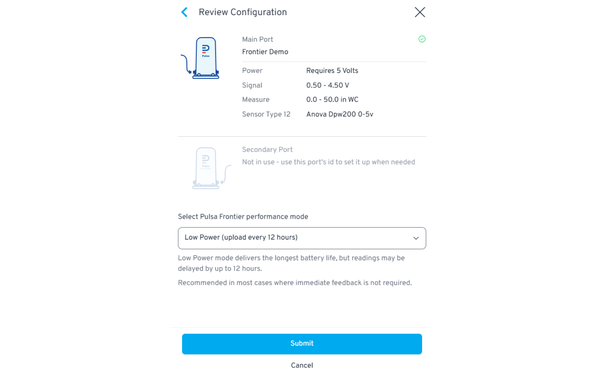
Review Port Configurations
- Review the configurations for the Main and/or Second Port(s).
- Choose the desired operational mode:
- Low Power Mode: Maximizes battery life:
- measures are taken every 15 minutes
- Uploads every 12 hours
- High Frequency Mode: Offers more frequent data uploads but reduces battery life.
- Measures are taken every 10 minutes
- Uploads every hour
- Low Power Mode: Maximizes battery life:
7
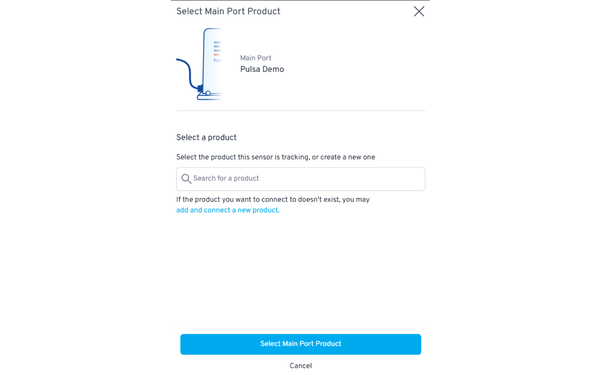
Connect to a Product
- Attach the sensor to an existing product or create a new product for the consumable to be tracked by the Main Port/Second Port.
8
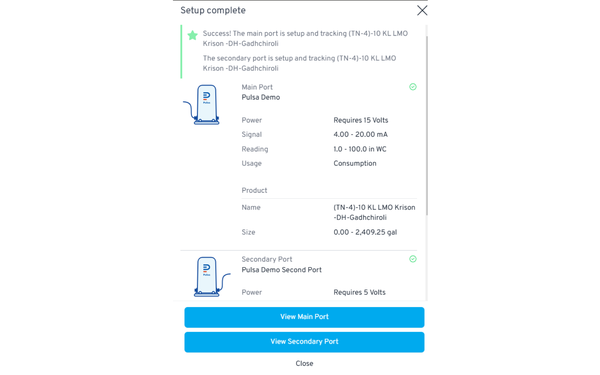
Final Review and Dashboard Access
- Verify the final Port Configurations and Product Settings.
- View your Frontier Ports on the Pulsa Dashboard!
Software Setup is now complete! 🎉 You may now proceed to physically connect your sensor(s) to the port(s).
9
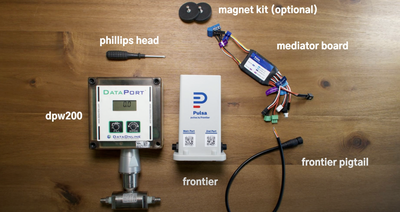
Physical Installation of the Pulsa Frontier Device (Recommended to do after Dashboard Set Up/Registration)
- Secure the metal bracket onto the Frontier device via the sliding mechanism.
- Place the frontier device on or near the tank and secure it via the bracket by using your selected method:
- Zip Ties
- Screws
- Magnet (sold seperately)

- Connecting to an Anova Differential or Headspace “Box” unit:
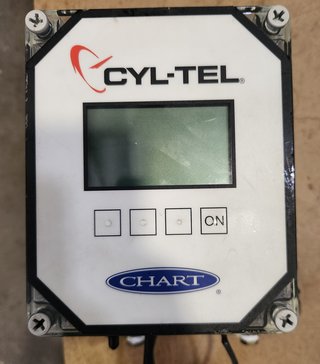
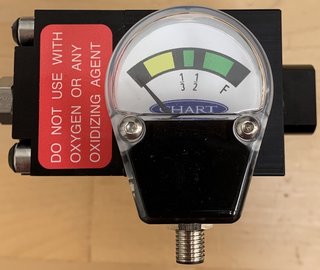
- Connecting to a Chart Cyl Tel “Box” unit
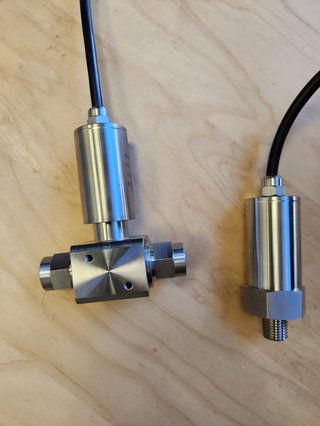
- Connecting to a Pulsa Frontier Sensor
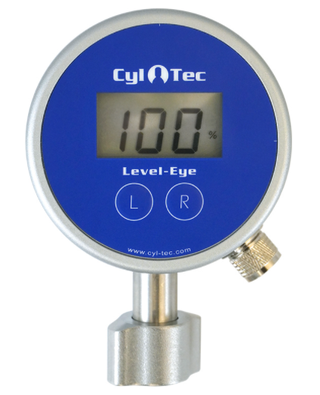
- Connecting to a Cyl-Tec Level Eye
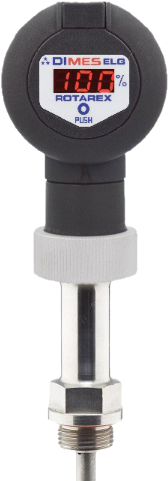
- Connecting to a Rotarex C-Stic Lite Unit
- Connecting to a Wika Gauge
- Connecting a Pulsa Frontier to an Anova Differential Pressure Sensor will require the use of the mediator board. Use this Help Center article and the video below to guide you through the wiring, noting that the article refers to connecting the mediator board to a Pulsa Link. The steps are the same for a Pulsa Frontier Link.
- Connecting a Pulsa Frontier to a Chart Cyl-Tel Differential Pressure Sensor will require the use of the mediator board. Use this Help Center article to guide you through the wiring, noting that the article refers to connecting the mediator board to a Pulsa Link. The steps are the same for a Pulsa Frontier Link. Please also note that not all Cyl-Tel sensors output 0-5 volts. *** Please verify the output for your sensor and adjust the setup process based on this information.
- Start by physically plumbing the Headspace and Differential Pressure sensor to the tank. Use the Differential pressure sensor plumbing guide as a reference and engage the lines at the end of this process.
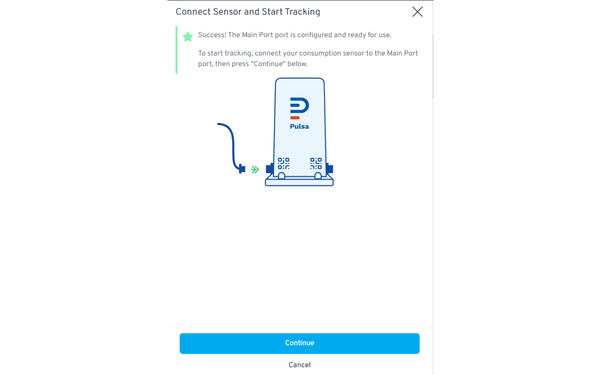
- Connect the Sensor(s) to the ports via the custom connector. The Main port acts as an On/ Off switch for the Frontier. Make sure to connect the sensor to the Main Port first. If you are using both ports, connect to the main port first.
- Connect the Sensor(s) to the ports via the custom connector. The Main port acts as an On/ Off switch for the Frontier. Make sure to connect the sensor to the Main Port first. If you are using both ports, connect to the main port first.
- Connect the Sensor(s) to the ports via the custom connector. The Main port acts as an On/ Off switch for the Frontier. Make sure to connect the sensor to the Main Port first. If you are using both ports, connect to the main port first.
- Connect the Sensor(s) to the ports via the custom connector. The Main port acts as an On/ Off switch for the Frontier. Make sure to connect the sensor to the Main Port first. If you are using both ports, connect to the main port first.
10
Verify that the Frontier and Sensor is Working as Expected
After the wiring is completed, plug in the connector to the respective port on the Pulsa Frontier and verify that the sensor is working as expected by scanning the port(s) in use and using the dashboard to confirm:
- The Frontier port(s) are seen
- The measures received for the port(s) are accurate to your gauge or expected values
- If your Frontier port(s) is not seen, or providing unexpected measures, check out our troubleshooting guide, or contact Pulsa Support
(916) 579-7267 / support@pulsasensors.com

