


1
Install gateway
- Plug your gateway into an outlet within range of your sensors.
- The gateway to sensor range is 350 feet direct line of sight, avoid metal & thick concrete obstructions in between
- The gateway will take 5-10 minutes to connect to the network, after which the green light will be solid

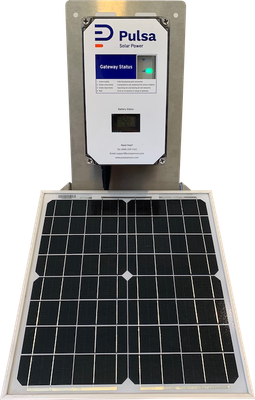
- For a detailed solar powered cell gateway installation guide: Solar Powered Gateway Installation
- Install your solar gateway within range of your sensors
- The gateway to sensor range is 350 feet direct line of sight, avoid metal & thick concrete obstructions in between
- The gateway will take 5-10 minutes to connect to the network, after which the green light on the top of the unit will be solid
2
Log in to the dashboard

3
Add sensor to your account
- Tap the scan button in the center of the tab bar at the bottom of the app.
- Position the sensor QR code in the camera frame and tap Scan, to open the New Sensor wizard.
- Give the sensor a name, and choose a company to assign the sensor to.
- [If you are a member of only one company the sensor will be assigned to that company automatically]


- Click on [+ Add] button in the top header
- On the resulting form, give the sensor a name, enter it's serial number and id, and choose a company to assign the sensor to.
- [If you are a member of only one company the sensor will be assigned to that company automatically]

4
Verify gateway
- Verify Gateway is displaying a solid green light.
- Gateway needs to be within within range of your sensors, which is 350 feet direct line of sight, and avoid metal & thick concrete obstructions in between
- Click on the circle icon in the top right of the Pulsa dashboard to see the last time the gateway saw your sensors

5
Physically install your sensor
- Install your temperature tag or tag with probe sensor in space where temperature monitoring is desired using double sided adhesive on sensor or loop for mounting
- Within 5-10 minutes, you should see an update in the Pulsa dashboard.

6
Confirm readings
- To determine if your sensor is working, navigate to [Sensor] tab on your Pulsa dashboard and confirm your newly created sensor is available and reporting
- After sensor setup, readings will be available within 5-10 minutes.
- View your sensor's "Last seen" time on the sensor's details page to confirm frequent readings
- A historical graph of your readings will appear within an hour of sensor setup
For more information on understanding your readings and troubleshooting, please visit: Troubleshooting

7
Update location
This step applies if setting up a new gateway. If your sensor will be installed with an existing gateway this step may have already been completed.
- Your sensor's location will be marked as "Unknown" if the gateway in use with your sensor does not have an assigned location
- To assign a location, click the gateway's name from your sensor's details page.
- Select a previously created location or create a new location
- Include the address or GPS coordinates of your new location to see it in map view
- Confirm location and click "Update gateway" to confirm changes


