

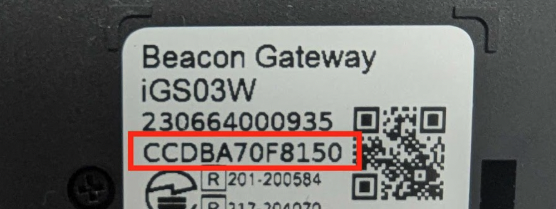
Register your wifi gateway
Register your wifi gateway to the Pulsa dashboard using the alphanumeric ID printed on the unit
Assemble & plug in
- Kit will come with gateway, antenna and plug in cable.
- Assemble and plug in the WiFi gateway to power
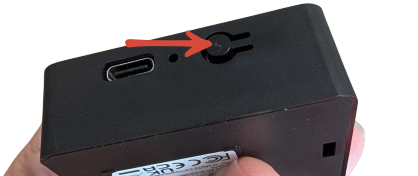
Push reset button
- While powered, push and hold the reset button on the side for 5 seconds.
Access Network
- Open WiFi setting on a nearby computer and select the network "PULSA_...". If WiFi doesn't appear in 30 seconds, press and hold reset again
- Enter the WiFi password "12345678"

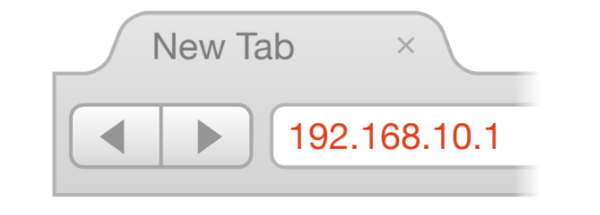
Open web browser
- In a web browser, open "192.168.10.1"
- When prompted, enter "admin" for both the username and the password
- For "Wi-Fi Mode", select "Station"
- Press "Scan" to find your WiFi network.
- Select your known network
- Enter your network's wifi password for the security key
- Note: Login info is securely stored and will never leave the device
- Click "Save" , then click "Reboot in the tab bar and you're done.
A success/ confirmation message may not appear. Check the Pulsa dashboard to confirm Wifi gateway's online status/ last seen time.
The Gateway will save your settings, even if unplugged, and can be setup again by pressing the reset button.
Confirm online status in the dashboard
- Return to the Pulsa dashboard and confirm the wifi gateway is online and has recently been seen
- Nearby sensors will begin transmitting through the gateway within a few moments

Troubleshooting
If wifi gateway does not show as online within 1-2 minutes of completing web browser setup (step 5), confirm the wifi network and password used is correct.
If the network or password selected is inaccurate, an active connection will not be established.
If the network or password has changed, reset the current settings by holding the reset button for 5 seconds while the unit is powered, and complete the setup process once more using correct details.