

![Weight Tile 02 [Regular]](https://conzume-site-hubspot.s3.us-west-1.amazonaws.com/media/images/WeightTile02-1200720.original.jpg)
1
Plug in gateway
- Plug your gateway into an outlet within range of your sensors.
- The gateway to sensor range is 350 feet direct line of sight, avoid metal & thick concrete obstructions in between
- The gateway will take 5-10 minutes to connect to the network, after which the green light will be solid

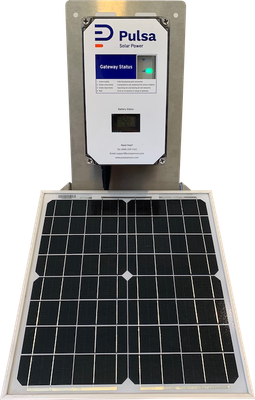
- For a detailed solar powered cell gateway installation guide: Solar Powered Gateway Installation
- Install your solar gateway within range of your sensors
- The gateway to sensor range is 350 feet direct line of sight, avoid metal & thick concrete obstructions in between
- The gateway will take 5-10 minutes to connect to the network, after which the green light on the top of the unit will be solid
2
Log in to your account

3
Add sensor to your account
- Tap the scan button in the center of the tab bar at the bottom of the app.
- Position the sensor QR code on the bottom of the weight tile scale in the camera frame and tap Scan, to open the New Sensor wizard.
- Give the sensor a name, and choose a company to assign the sensor to.
- [If you are a member of only one company the sensor will be assigned to that company automatically]


- Click on [+ Add] button in the top header of dashboard
- On the resulting form, give the sensor a name, enter it's serial number and ID (serial number and ID are located on underside of weight tile), and choose a company to assign the sensor to
- [If you are a member of only one company the sensor will be assigned to that company automatically]


4
Add platforms
Enter the platform ID numbers printed on the side of each weight scale board


5
Physically join platforms (only if linking multiple platforms together)
- Use provided metal links and fasteners
- Align the boards upside down to start
- Connect all boards with provided connector cables.
- Once all fasteners and cables are connected, flip platforms right side up and tighten connections.


6
Verify gateway
- Before attempting to tare sensor, verify gateway (cell powered or solar powered) is displaying a solid green light.
- Gateway needs to be within within range of your sensors, which is 350 feet direct line of sight
- Avoid metal & thick concrete obstructions in between for best performance
- Once sensor is setup, you can click on the circle icon in the top right of the Pulsa dashboard on selected sensor's page to see the last time the gateway saw your sensor.
For cell powered gateway and solar powered gateway troubleshooting, please visit: Troubleshooting

7
Tare weight tile sensor
For detailed information on Taring, visit Taring a Pulsa weight sensor
- Place the weight tile upside down so the feet are facing upward, and inspect the tile for any loose wires or damaged feet.
- Confirm that all audio connectors are fully inserted into both the Junction and the Core. If there is any doubt, remove each connector and reinsert.
- Then complete the software setup on web or app.
- Select option to tare the sensor and follow prompt to position the scale right-side-up as you intend to use it, but with no load applied.
- Press the tare button on the sensor housing to begin taring. Taring should take only take a few minutes and a message to confirm successful taring will appear.
- Sensor weight should now be reading zero weight. If not reading zero, press tare button again to re-zero sensor.
- Note: Never tare the scale with a tank with any product on there, or else that will become the new "0". Only tare either with nothing on the scale (and use the associated container weight in the next step), or tare with an empty tank on the scale (and set the container weight to 0 in the next step)


8
Connect sensor to product
- After initialization, follow prompts on Pulsa dashboard to connect your sensor to a product
- Your "product" is what the sensor will be measuring. You can add a new product or select from previously created products.
- When adding a new product, select company, name product, and enter weight of product when product is depleted, and weight of product when full (do not include container weight). Set unit of measurement. Confirm details and create new product.
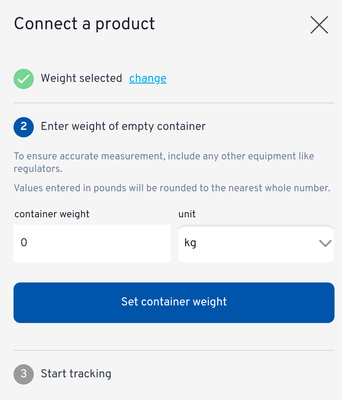
- Set container weight as the weight of the empty tank / container.
- If you had an empty tank on the scale when it was tared, set container weight to 0. Set a container weight only when you tared with nothing on the scale.
- Confirm your connection to start tracking new product
- Connected sensor should now be available on your dashboard.
For troubleshooting weight tile sensor readings, please visit: Troubleshooting

9
Place sensor
- Ensure weight sensor is placed on flat surface, safe from flooding, all four feet are touching the flat surface below, and that your scale housing is directly facing the gateway for best results.
- Place consumable products with container (if using container) onto weight tile (no re-taring required, do not tare again). Readings for sensor should appear within a few minutes.
- Note: Re-taring sensor after container/product is placed onto sensor may result in negative readings.
- Note: If your item to be weighed is larger than the platform dimensions, consider adding additional platforms.

10
Confirm readings
- To determine if your sensor is working, navigate to [Sensor] tab on your Pulsa dashboard and confirm your newly created sensor is available and connected to desired product.
- After sensor setup, readings will be available within 5-10 minutes.
- View your sensor's "Last seen" time on the sensor's details page to confirm frequent readings
- A historical graph of your readings will appear within an hour of sensor setup
- For an informative breakdown of your readings/ sensor, click the small question mark located near your percentage/ weight reading.
- Here you will see your sensor's gross measurement, container weight, tare weight and net measurement. Your selected product's empty size and full size, as well as percentage remaining will be available here.
For more information on understanding your readings and troubleshooting, please visit: Troubleshooting

11
Update location
This step applies if setting up a new gateway. If your sensor will be installed with an existing gateway this step may have already been completed.
- Your sensor's location will be marked as "Unknown" if the gateway in use with your sensor does not have an assigned location
- To assign a location, click the gateway's name from your sensor's details page.
- Select a previously created location or create a new location
- Include the address or GPS coordinates of your new location to see it in map view
- Confirm location and click "Update gateway" to confirm changes


