

The Pulsa Puck Scale makes monitoring the weight of tanks with legs quick, accurate, and easy to manage. Follow this step-by-step guide to install your Puck Scale and connect it to your Pulsa system.
Things to know before getting started:
- The Puck must be installed on smooth, level, and uniform surfaces. Installing the scale on uneven or unlevel ground will lead to inaccurate readings and potential installation issues.
What’s in the box
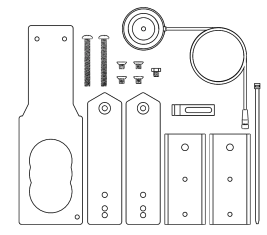
Your Puck Install kit includes:
- (1) Puck load cell
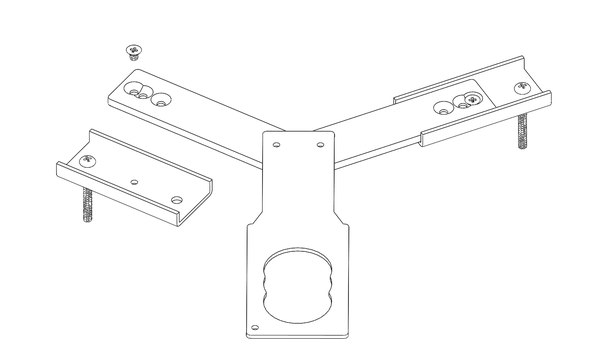
- (1) Sensor base bracket
- (2) Base position bracket
- (2) C Channel bracket
- (1) L-bracket
- (2) 3/8 x 3.5” bolts
- (4) 3/8 Countersunk bolts
- (1) 3/8 x 0.375”
- (1) Zip tie
Register and Power On Gateway
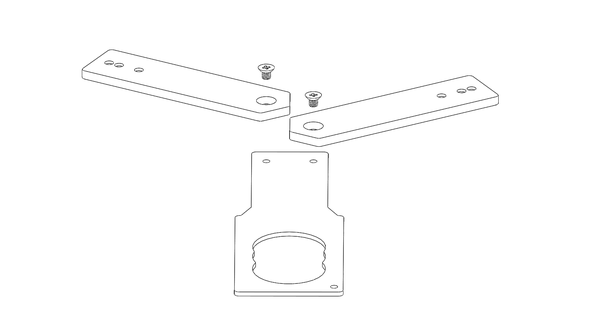
Assemble Base Brackets
Countersunk bolts x 2
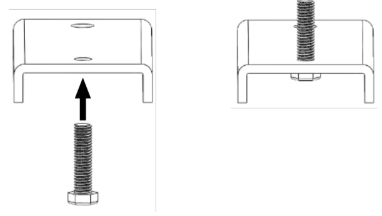
Thread 3/8” x 3.5" bolts into C-channels
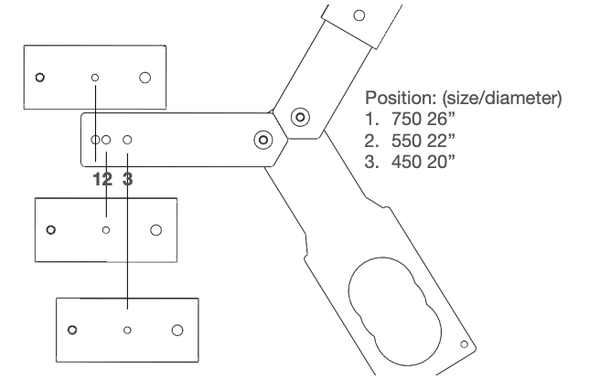
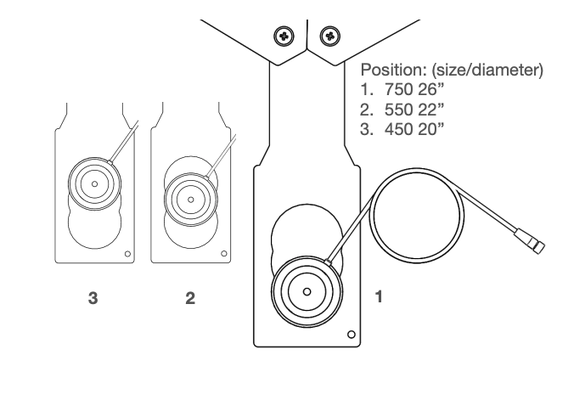
Choose position based on tank size
Select the appropriate opening based on your tank diameter.
Option 1: For Chart 750s, or with a 26" diameter
Option 2: For Chart 550s, or with a 22" diameter
Option 3: For Cart 450s, or with a 20" diameter
Note: For all options, the bracket should be threaded through the middle hole.
Assemble C channels to brackets
Bottom view of assemble
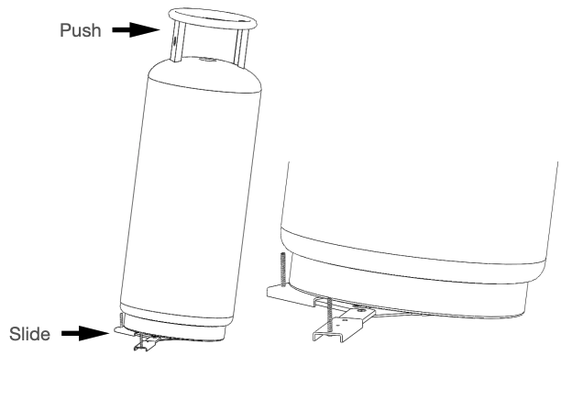
Tilt tank, slide frame under tank
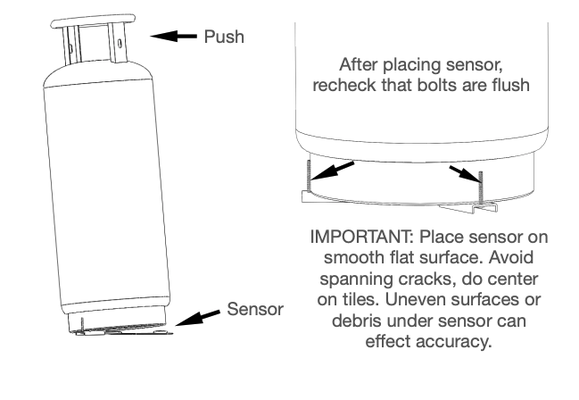
Push the tank away from yourself, and slide the install frame below the tank
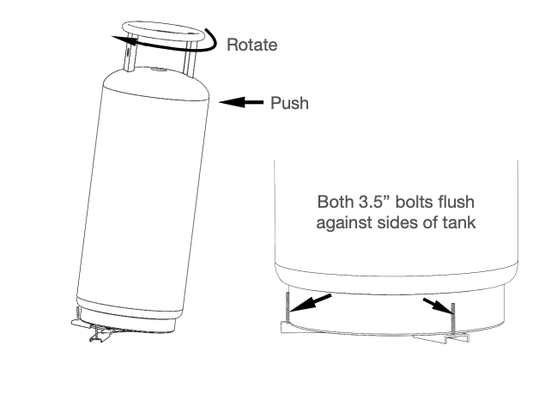
Rotate tank fully onto brackets
Confirm Both 3.5" bolts are flush with the sides of your tank after placing/ adjusting.
Sensor position based on tank size
Select the appropriate opening based on your tank diameter.
Option 1: For Chart 750s, or with a 26" diameter
Option 2: For Chart 550s, or with a 22" diameter
Option 3: For Cart 450s, or with a 20" diameter
Tilt tank, place sensor
IMPORTANT:
- Place the puck on a SMOOTH and FLAT surface
- Do not place the Puck over a crack (division in tile, grout, etc.)
- If placing on tile, center the Puck on the tile to avoid placing over any uneven surface
- Uneven surfaces and/ or debris under the Puck will affect accuracy
After placing the Puck, recheck the bolts are flush with your tank.
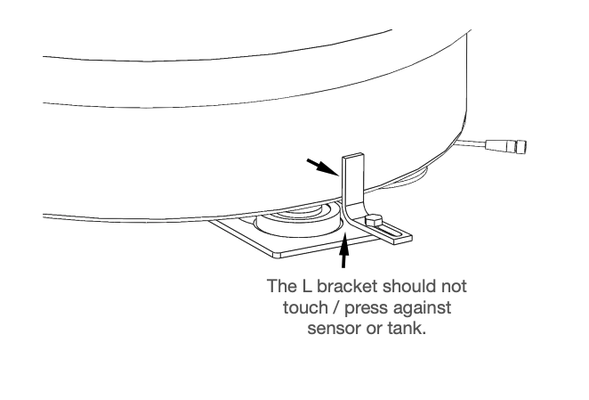
Attach L bracket, 3/8 x .375” bolt
The L bracket should NOT touch / press against sensor or tank.
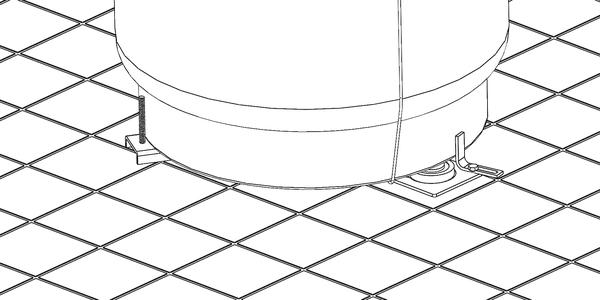
Route sensor cable up side of tank
The cable can be secured further by taping any excess along the tank.
Use the Pulsa app to scan QR code on Pulsa device and follow the setup wizard
Use the Scan button or the "+ Add" icon on the sensors list page to scan or enter the Pulsa Puck Sensor ID and serial number - then follow the steps to register the puck on the Dashboard.
Enter the empty container weight (e.g. tank tare weight) of the asset you'll be tracking.
Include the weight of any additional accessories or hardware that would be included in the total weight but should NOT be included in the trackable contents weight, or what we consider the product's full size. This may include items like hoses, safety rings, etc.
Your puck sensor will need to have a product assigned to it in order for Pulsa to know what's considered full and empty.
Select a pre-created product or create a new product from scratch.
The product name should be clear and descriptive, e.g. "Chart 750lb CO2".
The empty size should be zero unless unique conditions are required.
The full size should be what the container holds at 100% full.
Once complete, hit save to confirm and assign your product to your puck.
Your Puck should begin reporting within 3-5 minutes of completed setup.
Troubleshooting
If your puck displays as missing on the dashboard, or measures are not being received as often as expected:
- Confirm the gateway or frontier your puck is connected to is powered, and displaying as online in the dashboard
- If using a standard Puck and gateway system (non- frontier), ensure the Puck is in clear line of sight from the gateway, removing any obstructions if possible.
Puck values should be exact or very close to current tank levels. If your Puck displays measures that are inaccurate or unexpected:
- Confirm current asset levels
- Review Puck measurement breakdown by clicking the "Measurement Details" text on the puck's details page. Confirm the gross weight and container weight are as expected.
- If the gross weight is incorrect, review the puck installation. Pucks may read inaccurately if:
- Puck hardware is excessively tightened
- Puck hardware is on an uneven, non-level surface
- the weight placed on the puck is unevenly distributed i.e. check for gaps and or spaces between tank and ground.
- If the Puck's container weight is incorrect, update the container weight under the Puck's "Manage" panel.
- If the gross weight is incorrect, review the puck installation. Pucks may read inaccurately if:
For questions or troubleshooting assistance, contact Pulsa Support.